I had a friend as me this one the other day and I thought about what I would tell myself if I wanted to go back in time and do this to save money etc. Here is was I would say to me:
Absolutely you can elimiate some of your learning curve using digital! There are some things that you can only learn shooting film (like just getting used to it, see the rest of this blog for more info), but if you are strapped for cash here are a few things that will help you become a better film shooter with digital.
1. Shoot in manual. Pay attention to how the different setting affect your pictures including shutter speed, aperture, and ISO. This is just basic photography skills that you can learn on digital to improve yourself as a photographer. When you shoot with automatic settings, you don't have an much control and troubleshooting your manual results are a great way to learn. There are photographers who have narrowed their look to an exact science and this is a way to learn enough to figure out where you want to take your style. When you know about photography in general then when someone tells you about their specific way of shooting, it makes a lot more sense.
2. Shoot only a specific number of pictures. A roll of film has about 30 images on it. If you are taking a friend out to practice photography, instead of taking 300 pictures and narrowing it down to the very best 50, try limiting the whole session to 30 (that is 1 roll). Try to make every image count. You will think a lot more about what you are doing. Pretend that every time you click your shutter, it is costing you a dollar.
3. Read your manual. So many people intend to do this, but they never do. The first photography book I ever read was the manual. The first time I read it, I experimented with each step and immediately looked at the results on the computer to solidify the information. This is one of the best things I ever did because when I heard other people talking photography, I could ask questions and the answers made sense. Shortly after the first read, I read it a second time. It made more sense the second time because it answered questions I didn't know I had yet. Then when I would learn something new, I would think, "I remember reading something about that in my manual" and could quickly reference the information and get my answer. If you have lost your manual, you can look it up online and chances are find a free PDF online of your camera's manual.
There are some things you can only learn with film. Each camera is a little different and takes some getting used to. Also, if you are shooting with film, you can use a light meter that helps with exposure. If I don't have a light meter, I shoot with AV(aperture priority) or TV(shutter priority) settings and overexpose2-3 stops, but I still know enough about the settings to know what I want to use and when. If you are not sure, stick with manual until you have learned enough to know what you like. You can use AV and TV with digital to practice as well.
Thursday, December 31, 2009
Wednesday, December 30, 2009
What is aperture?


I have included in earlier posts a very brief description of what aperture is and want to expound based on a question I got on facebook. As you can see from these images the aperture refers to the size of the hole letting light into your camera. The larger the f-stop, the smaller the hole and less light for taking a picture. There are some specific properties associated with small aperture vs. a large aperture. A small aperture (high f-stop such as f/16) lets in less light which might be tricky in a low light situation and when you take the picture most everything will be in focus. When you are shooting at f/2 your film can get a lot more light and the plane of focus is very small. Any questions? Beuler?
Oh, one more cool thing, the shape of you aperture determines the shape how how blurry lights in your pictures look. For example, check out this picture. How would you guess that the photographer got the lights to look like hearts? hint: it's kind of a trick question
The images and more information are posted in this photography article
Tuesday, December 29, 2009
The rest of the story

Do you remember this post? I was heart sick because I thought I ruined some of my pictures. Well, I told Richard's what happened and they left the film in the developer longer than normal and all the pictures looked great when I got them back!! It saved my skin! The pictures were eventually published on Snippet and Ink a national wedding blog. Check it out!
Wednesday, August 26, 2009
Another exeriment with overexposure


I have been playing with the idea of overexposing a few stops and just shooting without metering that much. If I am at 2.8 aperture, then shooting at like 1/125 or 1/250 in the shade and just going for it even if the light changes. Check these out. I was at a session and my light meter started giving me the same exact reading even when I moved it to a very different lighting situation, so I obviously knew it wasn't working. I just tried to make a conservative estimate of what the light was at erring on the side of overexposure. I took both of these images right at sunset and my setting for both images was 2.0 1/60 (it was my conservative estimate, remember? But I forgot to give it a few more stops when we went into the direct sun). I am guessing that I was about six stops over in the sunny one and maybe 3ish in the shaded one.
Look how sunny and colorful the overexposed image is! It's very Hawaiian vacation-ish and this is Oregon!! The water was grey to the natural eye!!
Thursday, August 20, 2009
Exposure Comparisons
I have been looking forward to the results of this test for a while! Let me explain, the close series is taken with the 400H. The image on the far left is one stop overexposed, the far image on the right is 6 stops overexposed and each image in between represents one stop difference. The second series (more zoomed out) is the same thing, but with the 800Z. Notice how the more overexposed the image is, the more soft and less contrasty it becomes. Now, I was really surprised there wasn't a greater difference in the images and the two images side by side were taken from the 400H test and I just played with with color and levels in photoshop to make them look really similar. You have so much latitude shooting film! When in doubt, just bump up your exposure! None of the images in the two series are photoshopped.


With that, I am going to announce my studies in film are mostly complete! I don't have enough content to continue posting everyday, but every once in a while when I learn something new, I will try to share it.


Fuji Neopan 1600


There are a few of the getting ready pictures from the wedding I posted yesterday. I was so ticked that these turned out so well. I metered for the light side of the room and the dark side (when I switched to the angle of the shadows. At one point, I forgot to switch back to the light side and overexposed some of the images a total of two stops, but they looked great! It was so impressive to have that kind of latitude with true black and white film. At one of the last weddings I did (but haven't gotten the film back for) I wanted to take a bunch of candid shots of the guests talking and enjoying each others company, but I wanted to shoot it film. So what did I do? I exposed for all angles of the area I was shooting and there was about a one stop difference from the shadier side of the area to the brighter side. I am really liking to overexpose everything at one stop just as a given for protection(because underexposing is like the worst thing you can possibly do), so I metered for the shadiest area and exposed over that one stop. That means that all of the images I shot of the guests were either one or two stops overexposed depending on where they were standing and what angle I shot it. Those will be posted at a later date and I hope they turn out, but I thought I was pretty clever on that one :)


Wednesday, August 19, 2009
Some 800Z


These are taken right out of camera and 1/2 stop overexposed. I exposed for the shadows with my light meter and the light meter was telling me that it was overexposing at the aperture I wanted 1.5 so I doubled the shudder speed to make it only .5 over. These are straight out of the camera taken at f2.8 with the Pentax 645. I did have some issue with flair as you can see and although I do like flair sometimes, it just doesn't look very good on film and I also want to have control and not ever be surprised when I get my film back. For that reason, when I buy my Contax (which is hopefully soon) I will be getting a bellows for it to block all flair. Jon has one on his Contax and says it works like a charm and way better than the lens hood that goes with the Contax lens.
Tuesday, August 18, 2009
Some Bad Ones
What went wrong? I don't know...could have been because I didn't have a light meter? Okay, so these are some that I wonder about. They are weird looking. What do you think? They were shot with 400H.


Monday, August 17, 2009


Friday, August 14, 2009
Wedding Day
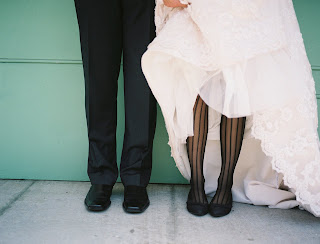
The next two posts are from the day we had "Bride and Groom" models. I am just throwing these up with not a ton of details, they just need to be posted :) They are all taken the Jon Canlas way with exposing for the shadows, very simple! I hope I can replicate the look at home, ha ha. We will see when I get me next batch of film it!
I also have some pictures that I took from the rooftop restaurant at the hostel where a lot of us stayed. What a view!!


I also have some pictures that I took from the rooftop restaurant at the hostel where a lot of us stayed. What a view!!


Thursday, August 13, 2009
I don't want a learning curve!

It is so difficult to make mistakes shooting film! Today at a wedding I fear that I underexposed some of my images by 4 stops! Luckily Mel was there shooting digital as my backup so there is no harm other than to my hopes and dreams of getting some amazing film shots. I feel like I am getting so much better at shooting film and I rocked that roll other than my one tiny little issue of completely ruining the roll!
Ya know, that is the second time I have messed up my exposure because I forgot to check the aperture before shooting away, the first time I caught it after shooting only three images and just re shot them, but this time, my heart broke a little inside.
On a more positive note, I got a bunch of film back from the lab (I have been shooting a roll or two at every wedding this year and I LOVE what I am getting! Here is a pretty image that I love. Click on it to see it bigger because this little thumbnail just won't do it justice ;)
Wednesday, August 12, 2009
More of the same
The context of some of these has been explained in earlier posts. Another head shot of Polly (my main testing-out-my-own-ideas model) and touching strangers in the harsh harsh sun. Film is amazing!


Subscribe to:
Posts (Atom)